UI Navigation
In Responsive UI we talk about the need of designing an interface that works well for most devices. The same challenge exists when the time comes to control this interface.
Mark your UI
The first step consists in declaring controls hierarchy.
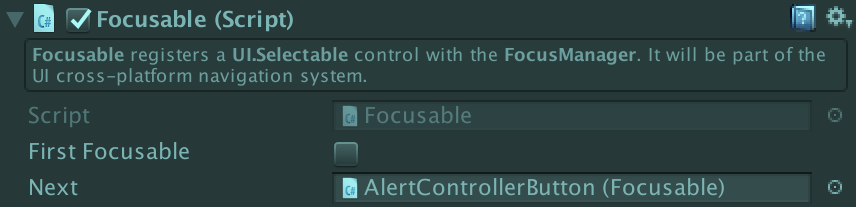
Focusable
Every control should have a Focusable component. Note that we are based on Unity.UI so a control also requires a Selectable component.
You can specify whether it is the first control to get the focus. You may also target the next focusable element, used in the Next / Previous chain.
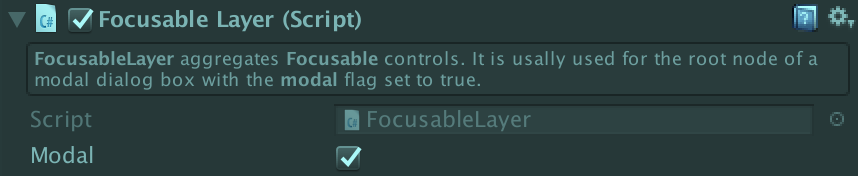
Focusable Layer
A Focusable is automatically registered with a FocusableLayer. This layer simply offers the capability to be modal. This means for example that when a modal popup appears onscreen, the user will only be able to navigate within this popup.
Handle Input
Case 1: You don’t already have a custom InputManager
Give a try to our input management system.
Add UINAVIGATION in your Scripting Define Symbols (Edit > Project Settings > Player). This will automatically select a specific InputManager.asset in Assets/AsmodeeNet/Lite/UserInterface/UINavigation/InputManager~/ according to your current platform. This is done by InputManagerSelector.
Known bug: sometimes if you Switch Platform you will have to restart Unity to have the switch of InputManager.asset taken into account.
We currently provide an InputManager.asset for desktop computer and iOS. If you design new ones for other platforms, please share them with us!
Our UINavigationInput script looks after the following names: Tab, Shift, Previous, Next, Edit and some StandaloneInputModule elements : submitButton, cancelButton, horizontalAxis, verticalAxis.
Case 2: You already have a custom InputManager
Otherwise you can provide you own version of UINavigationInput, and implement ProcessInput.
public class MyCustomUINavigationInput : UINavigationInput
{
        public void ProcessInput(UINavigationManager navigationManager)
        {
                ...
        }
}
You will also have to register with the UINavigationComponent.
CoreApplication.Instance.UINavigationInput.navigationInput = new MyCustomUINavigationInput();
Give a look to DefaultUINavigationInput for implementation details.