Authenticating the user (SSO)
Introduction
In order to call endpoints with private scope, the player must be authenticated.
Authentication is done through the SSO (Single Sign-On). When calling the SSO, your game will prompt a window which will start a flow asking the user for their login and password, or if they don’t have an account yet, guide them through the account creation process.
You may never directly ask for a private token yourself: if an endpoint needs a private token, it will automatically ask one to the OAuthGate, which will starts the SSO if it doesn’t have one.
[TLDR] Nothing to do
We provide a complete workflow directly inside the SDK. If you are pleased with the Asmodee.net skin, you don’t have anything to do. The integration of the SSO will be completely transparent for you.

Skinning
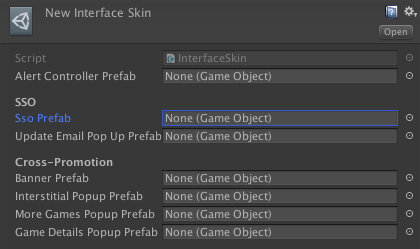
You can skin the SSO panels by following the process described in Skinning the User Interface.
You have to provide two prefabs:
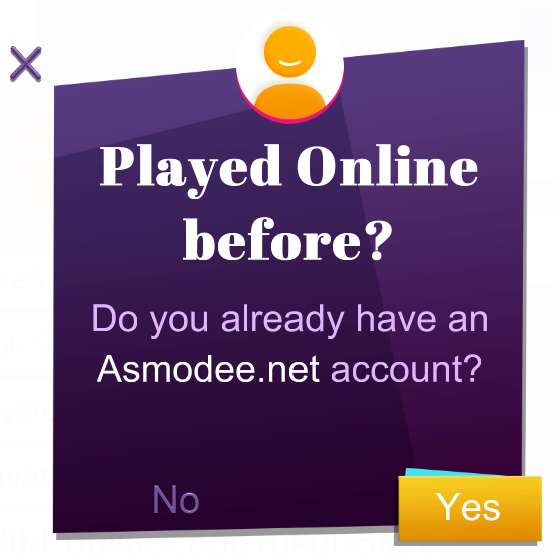
SSO prefab for main workflow
- Do you have an account panel
- Login panel
- Password panel
- Choose a login name panel
- …
Update Email Pop Up prefab, used when a player has a missing (or invalid) email

Provide your own SSO
If skinning is not enough for you, you can implement your own workflow.
The SSO must be initialized before being called, it is not possible to get a private token otherwise. In order to do this, you need to call the OAuthGate SetSSOHandler method.
Note: the OAuthGate can be retrieved from the CoreApplication singleton.
public void SetSSOHandler(SSOHandler ssoHandler)
The SSOHandler delegate is bit complex, so let’s break into it. We’ll see its parameters first, and then how to use it.
A SSOHandler takes 3 delegates as parameters:
SSOAuthenticate authenticate: this function takes a login and password, and a completion callback. The completion callback is of typeOAuthCallback, which takes an error parameter that may happen during authentication (e.g. bad login/password combination, no response, etc…). If this error isnull, it means that the authentication is successful.OnSSOSucceeded onSSOSucceeded: Typically this function is called when theauthenticatefunction is successful (see just above), in order to resume token requests and end the authentication process.AbortSSO abortSSO: You want to call this callback if the user aborts the authentication, but not when the authentication fails; indeed in this case, you would rather ask the user to retry.
We provide those methods through delegates because they are private inside the OAuthGate class. So the only way to authenticate the user is to correctly set up the SSO, and we show you how to do it in the next steps.
Setting up the SSO
The following code snippets show you a way to initialize the SSO.
public class SSOManager
{
        private SSOAuthenticate _authenticate;
        private OnSSOSucceeded _onSSOSucceeded;
        private AbortSSO _abortSSO;

        public void DisplaySSO(SSOAuthenticate authenticate, OnSSOSucceeded onSSOSucceeded, AbortSSO abortSSO)
        {
                _authenticate = authenticate;
                _onSSOSucceeded = onSSOSucceeded;
                _abortSSO = abortSSO;

                // Display first window of login flow
        }
}
Let’s say you have a class called SSOManager, which handle the SSO flow. It should have a method like the one described above, with the exact same signature. This is this method which will be used to initialize the SSO.
This way, any time the OAuthGate needs to authenticate the user, if no refresh token is available, this function will be called, and your SSOManager will start.
private void Start()
{
        SSOManager ssoManager = new SSOManager;

        OAuthGate oauthGate = CoreApplication.Instance.OAuthGate;
        _oauthGate.SetSSOHandler((authMethod, onSSOSucceeded, abortSSO) =>
        {
            ssoManager.DisplaySSO(authMethod, onSSOSucceeded, abortSSO);
        });
}
Here, the SSO in the OAuthGate is initialized with the method described previously. This code should be executed before calling any endpoint which requires a private token.
Using the SSO
Here are some sample methods that describe the best way to use the callback provided by the SSO.
// UI callback when a user validates a login/password
public void AuthenticateUser(string login, string password)
{
        _authenticate(login, password, (error) =>
        {
            if (error == null)
            {
                    _onSSOSucceeded();
                    // close the SSO UI
            }
            else
            {
                if (error.status == 401)
                {
                        ShowErrorMessage("Bad login/password combination");
                }
                else // no response, error 500, timeout, anything else...
                {
                        ShowErrorMessage(error.description);
                }
                Retry();
            }
        }
}

public void AbortAuthentication()
{
        _abortSSO();
}
Your SSOManager should call the authenticate delegate provided by the SSO with the login and password given by the user. In the case where the authenticate method succeeds, then a call to the other callback _onSSOSucceeded is made, and this will end the SSO and the authentication flow. In any other case, the user is informed with the error, and the SSO offers them another chance to authenticate.
Note that no call to _abortSSO are made even if the authentication fails. This call is made in a separate method, which will only be called when the user exit deliberately cancels the SSO.
Auto-authentication with Steam
- Provide your Steam Game Id in your Core Application component
- Build your game including the Steam API library required for your target platform
- Add
STEAMin your Scripting Define Symbols (Edit > Project Settings > Player).
This SDK supports any third party API that allow you to communicate with Steam. For that, you need to create an implementation of ISteamAgent to create a brige between the SDK and your plugin. This implementation need to be inherit from Component and to be linked in SteamAgent field of your Core Application.
By default, the SDK provides an implementation for Facepunch.Steamworks. For enable it :
- Integrate Facepunch.Steamworks in your project
- Add
FacepunchAgentin your Scripting Define Symbols (Edit > Project Settings > Player). - Done